Search
Search
1419 results were found.
Safety and Accessibility
Working on cone-shaped roofs can be hazardous due to their steep angles and height.
Safety should be a priority:
- Set up scaffolding around the base of the roof to provide a stable working platform. This will allow you to access all the areas, to store your shingle pieces and to lean a ladder onto the roof to support yourself on the cone while roofing it.
- Use IKO Roof brackets to improve movement and stability on the roof.
- Roofing a cone is labor-intensive and costly, so account for additional expenses, including scaffolding, in your project budget. It is faster and cheaper in the long run and will make the job come out better too.
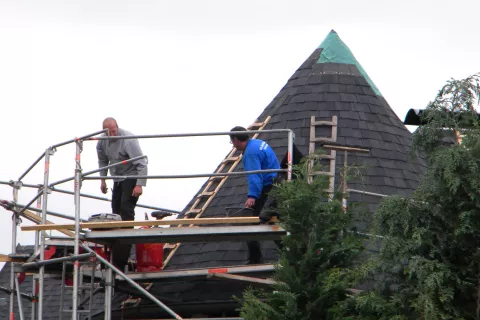
By following these expert tips and techniques, you can successfully shingle curved and cone-shaped roofs, creating a stunning, weather-resistant finish that stands the test of time.
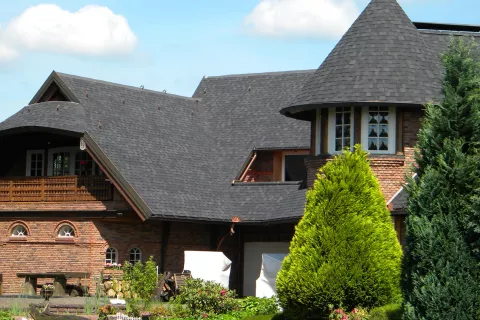
Take a look at the following before and after, to see how beautiful shingles can look on these types of roof.
Before shingle application
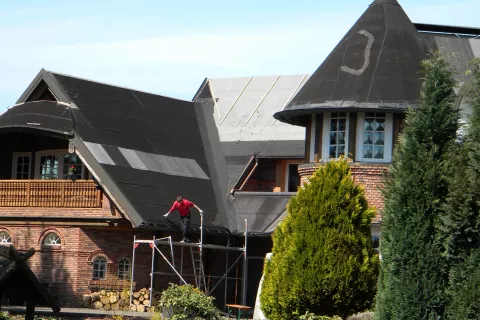
After - Application of Cambridge Xpress Dual Black (52)
Interested in the products mentioned in this blogpost?
There are a lot of factors you need to take into consideration when deciding on the right roof for your next project: type of material, design, color, waterproofing characteristics.,.. But a factor that is often overlooked, is the guarantee.
When you choose shingles as roof material, guarantee can differ a lot between different players. Let’s take a look at the most important components of your guarantee:
- Guarantee period
- Guarantor of your roof
- Guarantee terms
- Guarantee conditions
- Claim procedure

Guarantee period
The guarantee period for bitumen roof shingles varies depending on the manufacturer and the specific model.
Manufacturers typically offer two types of guarantees:
- Full guarantee – During the full guarantee period, manufacturers usually cover
the cost of removing defective roofing, disposal, and installation. - Limited guarantee – Liability is limited to the depreciated cost of roofing materials
(which does not include labor costs for removal, disposal, or installation).
This means that after the full guarantee expires, the material costs will be reduced according to the depreciation rate defined by the manufacturer.
Some manufacturers also classify buildings based on their intended use. Family homes may have a different guarantee scope than public utility buildings.
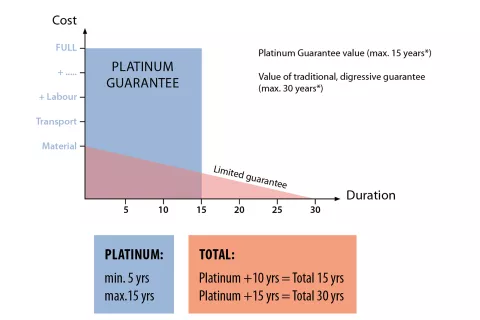
In case of European-made IKO roof shingles, our full guarantee is known as Platinum Guarantee. Depending on the type of shingles, this Platinum coverage is between 5 and 15 years. Adding the limited guarantee (limited to the material), the total IKO guarantee will be between 15 and 30 years.
A full explanation of the IKO Guarantee can be found here.
Who is the guarantor of your roof?
Check who the guarantor of your roof is. Many guarantees available on local markets are issued by distributors, which means they may not necessarily be manufacturer guarantees (in some cases they differ significantly).
Ask yourself whether the manufacturer will honor such a guarantee in case of problems.
>>> IKO’s guarantee periods are always clearly stated in the product data table on the relating IKO product page.


