

Everything you need to know about roof and attic ventilation
Ventilation of your shingles roof has many advantages. It will lower the temperature of both the shingle roof and the space directly underneath, leaving the roof structure unaffected and preventing accumulation of moisture in the attic. Let’s take a look at ways how and reasons why to ventilate your roof/attic.
1. What is roof/attic ventilation?
Ventilation is simply the process of supplying a continuous supply of air through the attic space.
“Proper ventilation” consists of 50% intake ventilation, near the lower part of the attic space, and 50% exhaust ventilation, near or at the roof peak. The exhaust ventilation must be positioned at least 91cm higher than the intake system.

2. Why ventilate your roof/attic?
Heat and moisture can be enemies of a shingles roof. To reduce any chance of harm, you must ventilate year round, and this is a must in all geographical areas year round.
- Heat buildup in unventilated attics damages the shingles, roof sheathing, and radiates to the living area. In unventilated attics the temperatures often exceed > 66°C, causing discomfort in the living area and even an increase of the energy bills (due to inefficient air conditioning)!
- Usually improper intake is the cause for moisture related problems in attics. Moisture is the #1 roof enemy, causing rot, mildew, mold, paint blisters and ineffective insulation! Attics that are not properly ventilated have moisture trapped inside created by simple condensation. Air inside an improper ventilated attic will always be warmer than the air outside. When this warmer & moist air comes in contact with the colder roof sheeting or other structural elements, condensation will occur.
!!! IMPORTANT:
- Proper ventilation fights heat & moisture build up in your attic
- Proper ventilation eliminates mold/mildew which can lead to major health problems!
- Colonizing spores need a food source = heat & moisture. Extreme caution should be exercised if an odor or mold colony is detected!
- All shingle manufacturers void their warranty if shingles roofs are installed over improperly ventilated attics!
- In order to validate the shingles manufacturer warranty you should follow the manufacturers application guide, with ventilation being one of the essential topics to be followed.
- Proper ventilation is not only an important issue for shingles manufacturers, but by building codes, utility companies, HVAC companies, manufacturers of insulation, plasterboard, paint, floors, furniture, doors and windows stress the importance.

3. How to build a ventilated shingles roof/attic?
1. IKO shingles
2. IKO underlay
3. Roof deck
4. Ventilated air gap
5. Insulation
6. Vapour barrier
7. Ceiling
To build a ventilated shingle roof you should create an open space under the roof deck which allows the continuous supply of air through the attic space, air intake at eaves and exhaust as close as possible to the roof peak.
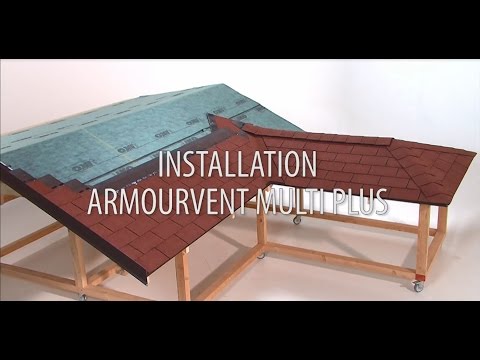
The air gap between the insulation and the roof deck must be 4 to 6 cm. Air should flow in from the bottom of the roof (eaves) and out through the roof peak. Armourvent Multi (Plus) or Ridge Plus are the ideal vents on the roof ridge, Armourvent Standard vents can be positioned close to the ridge.
The continuous air movement follows the laws of physics. Because hot air is less dense it will always rise (getting out through exhaust vents) and once the hot air moves, it also pulls fresh air into the attic (through intake vents). That is how continuous air flow prevents heat & moisture builds up in to the attic. There is no better way to build a roof assembly than to have a ventilated attic!

4. How to properly size a roof/attic ventilation system?
To properly size the ventilation system you must calculate the total required net free area (NFA) of vent opening. To do so you must take into consideration the roof pitch and surface of the “warm” ceiling under the roof/attic (P).
For efficient roof/attic ventilation you should also focus on having an absolute air tight ceiling, which means not to install the HVAC units (Heating, Ventilation, Air Conditioning) inside the attic and to avoid as much as possible the ceiling penetrations. When installing kitchen and bathroom fans, you shouldn’t vent them into the attic space. These heat and moisture sources must be ventilated outside on top of the roof, not under the roof eave because moisture will trap into your attic.
!!! Attention:
For roofs with vapor barriers you can decrease the NFA result with 40% (you need less ventilation).
But in certain regions (coast or mountains) special building regulations may apply! Always follow the local building code!
Note: In hot weather conditions or cathedral roof or insulated roof with pitch between 41° - 85° you should duplicate the ventilation and airflow by using 150 as divisor factor instead of 300!
Example of calculation:
- Roof area (P) = 120 m²
- Roof pitch = 35°
- Total required net free area (NFA) of vent opening = 120m²/300 = 0.4 m² = 4.000 cm²
50% intake & 50% exhaust => 2.000 cm² exhaust and 2.000 cm² intake

Using the technical description of the IKO vents range you can complete the calculation for the exhaust. Following the same algorithm you should complete the calculation for the intake vents (taking in to consideration products technical parameters).


Option A. Armourvent Multi or Multi PLUS ridge vent
Ventilation area of Armourvent Multi & Multi PLUS = 275 cm²/m
This vent can be used as EXHAUST vent as well as INTAKE vent (check the product application manual).
Minimum linear m of EXHAUST (ridge vent) required over total roof = 2.000 cm² / (275 cm²/m) = 7,50 m
Minimum linear m of INTAKE (ridge vent) required over total roof = 2.000 cm² / (275 cm²/m) = 7,50 m
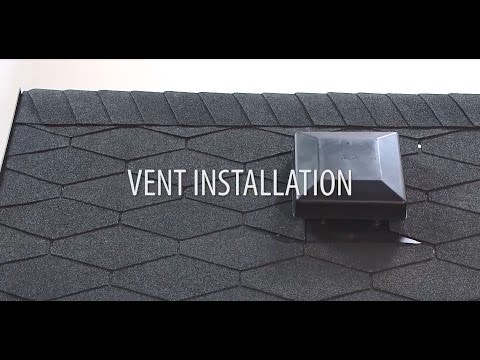
Option B. Armourvent STANDARD
Ventilation area of Armourvent STANDARD = 322 cm²/pc.
This vent is recommended to be used as EXHAUST vent.
Minimum number of Armourvent STANDARD required over total roof as EXHAUST vent = 2.000 cm² / (322 cm²/pc) = 6,2 rounded up lead us to 7 pieces. Armourvent STANDARD needed to cover the exhaust needs.
For the INTAKE you should choose the best solution for your project providing a continuous air flow and the minimum intake ventilation area to be equal with exhaust area (2.000 cm² in this example).
Which is better – too much intake or too much exhaust?
If an exhaust product (e.g. Armourvent STANDARD) is looking for intake and balanced intake is not provided, the exhaust product could use another exhaust product for intake and then you have “DEAD SPOTS when referring to roof ventilation”. Therefore, adequate or slightly more intake is better.
As long as you have a “balanced” system, you will not over ventilate your attic.
!!! Important:
- Install a “BALANCED” system 50% intake & 50% exhaust
- Install all exhaust vents at the same height within a common attic area!
Installation of the exhaust vents at more than one level on a roof allows the upper exhaust vent to pull air from lower exhaust vents rather than from the intake vents. Intake air must come from intake vents located near the lower part of the attic space to properly ventilate the total attic area and eliminate heat & moisture builds up! - Install only one type of exhaust vent within a common attic area!
Exhaust vent pulls air from the easiest intake source. Vent types cannot be mixed. The use of different types of exhaust vents could make one of the vents to act as intake for the other. Intake air must come from intake vents located near the lower part of the attic space to properly ventilate the total attic area and eliminate heat & moisture builds up!
As you can see above there are only few things that you have to do correctly to ensure proper roof/attic ventilation in all geographical areas in the world all year round! Good luck!

